Streamlining AWS Amplify backend deployment via Github actions
Making ship happen: Nerd, Software developer: Rubyist, Gopher, Rustacean, Pythonista and whatever JS devs are called. Blender(#b3d) fanboy. May constantly talk about physics!
In case you're not familiar with Amplify, it's a Backend as a Service (BaaS) offered by AWS. It's pretty similar to Firebase though one would argue that Amplify has more to offer. Like all BaaS platforms, it has its ups and downs but when running smoothly, Amplify can be a very powerful tool.
This is not a tutorial on Amplify, this assumes you have already initialized a project and want to deploy it. Out of the box, Amplify has been built as a fullstack hosting solution; it can host your backend as well as your frontend application. However, this only works well then you plan to host everything on Amplify. If you prefer something like Vercel for the frontend, you might find yourself needing to deploy your amplify backend via Github Actions which is what this blog is about.
Configuring AWS Credentials
Assuming you have a repository on github with an amplify project, you'd want to connect different branches to different amplify environments i.e when you push to branch master, this triggers a deployment of the prod environment or something similar. To set this up, you'll need to do a few things:
Add OIDC Provider for Github Actions
Github actions requires a role to use to access your AWS resources when pushing/pulling your amplify environment. This is configured through OIDC and is the recommended approach as opposed to using access keys.
To do this, go to the IAM console, under Identity Providers and add choose
Add Provider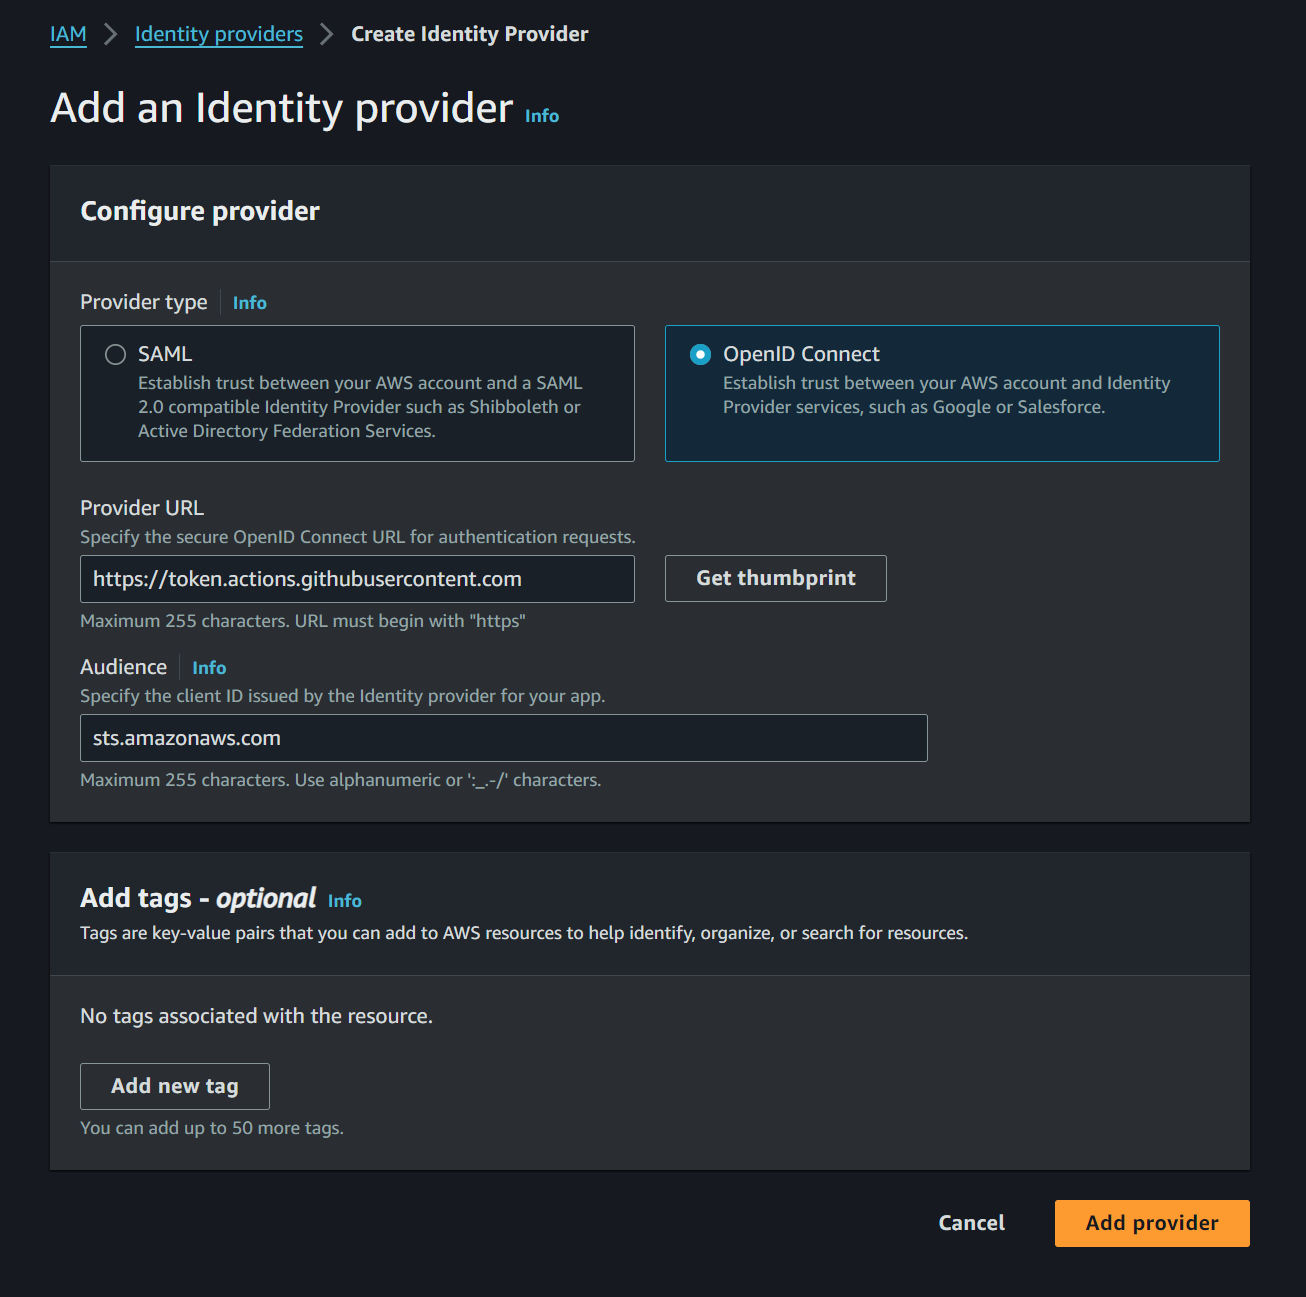
Set the Provider URL as https://token.actions.githubusercontent.com
Set the Audience as sts.amazonaws.com
Create an IAM Role
Next, you will need an IAM role to use the identity provider created above. This is role that will be used when deploying. While still under the IAM console, head to roles then proceed to create a new one
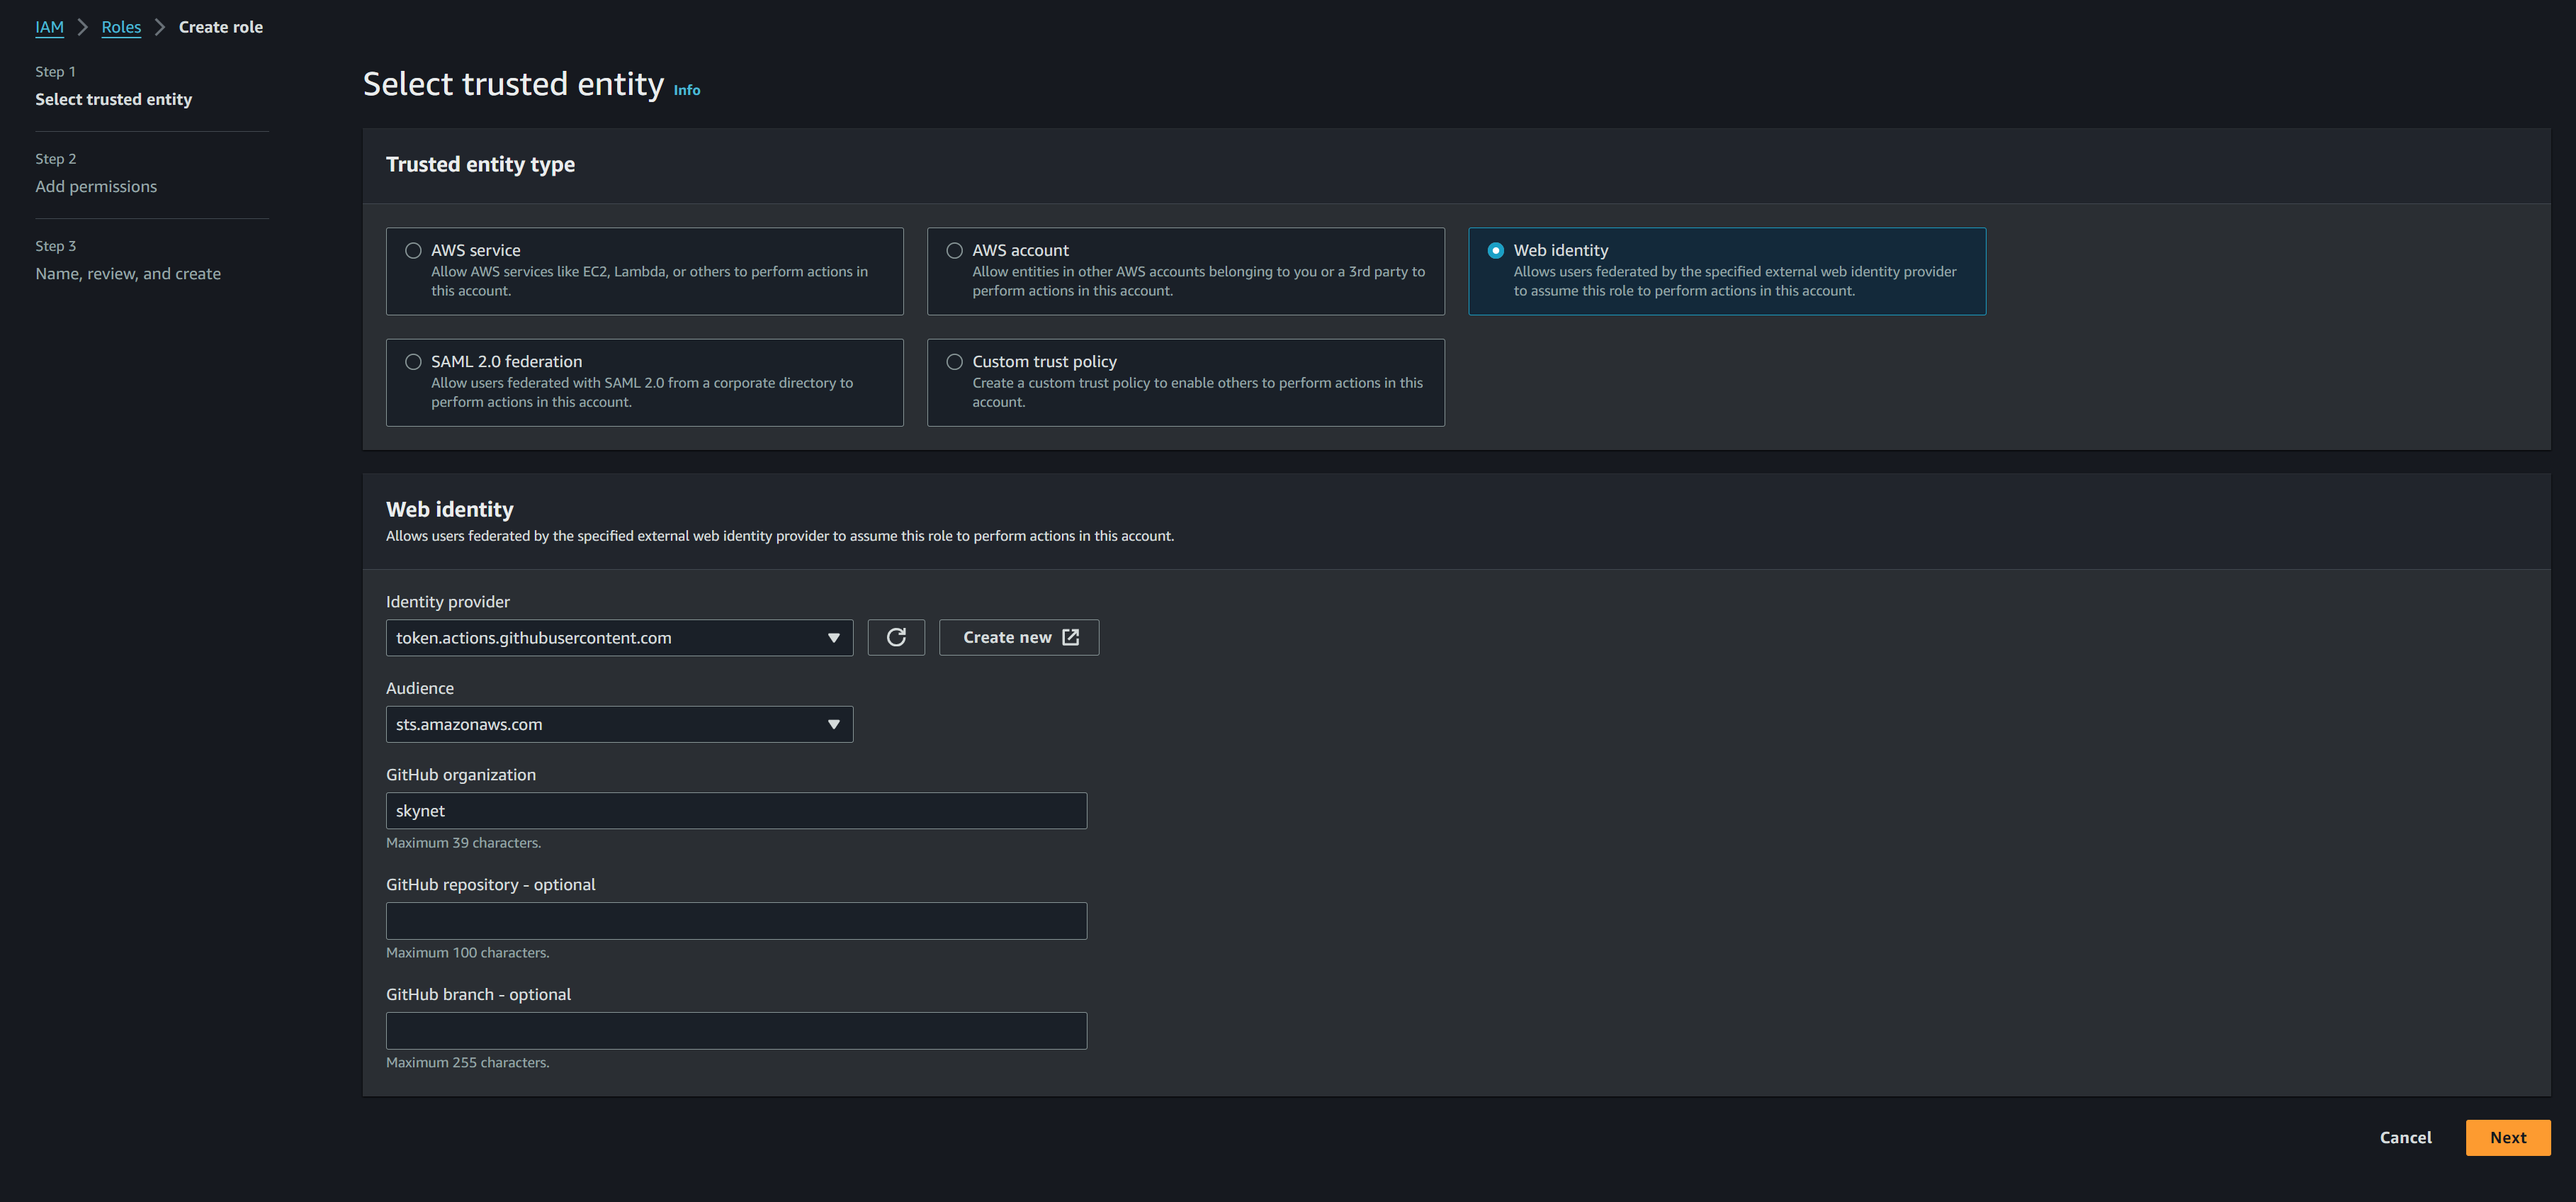
Select
Web Identityas the entity type then select the identity provider and audience we just created. Finally, set the name of your github organization. Repository and branch are optional.In the next step, under permissions, add the
AdministratorAccess-Amplifypolicy then review and create the role.
You can read more on configuring AWS credentials for Github Actions here
Creating the Github workflow
AWS does provide an official action to use with the credentials we just setup. It can be found on this repository https://github.com/aws-actions/configure-aws-credentials.
Pulling credentials is only the first step of pushing/pulling an amplify backend. We still need to determine the environment and then actually complete the deployment. All this can get a bit involved which is why we created an action to simplify this. Whether you want to push/pull, the action provides all the steps required to do this.
The action is at an open source repository on https://github.com/thejumba/amplify-action. The following is a simplified example of how you would use it to push an amplify environment. Your workflow should resemble this:
name: example-pull-workflow

on:
  push:
    branches:
      - staging

# this is required for permissions
permissions:
    id-token: write

# ...
jobs:
    pull-amplify:
        runs-on: ubuntu-latest
        steps:
        - name: Checkout code
          uses: actions/checkout@v2

        - name: Pull amplify environment
          uses: thejumba/amplify-action@main
          with:
              action: pull
              amplify_env: staging
              aws_region: us-east-1
              amplify_app_id: ********
              role_arn: arn:aws:iam::******:role/role-name
The role_arn is obtained from the role we just created in the steps outlined above. The rest of the inputs depend on the configuration of your amplify project. The action is defined as either push or pull depending on what you'd like to perform.
Any environment that you try to push/pull has to be defined in the amplify/team-provider-info.json otherwise the workflow may fail.
And that's it! That's all you need to setup a CI/CD pipeline for your amplify backend via Github actions. See more from Jumba Open Source here. Thank you for reading!